
Rear disc brake conversion.
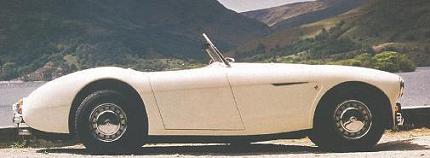
The suspension of the Haldane Mk1 was based on Vauxhall Chevette (Opel Kadett) components.
The rear axle from the Kadett has drum brakes by default.
Time to convert these to disc brakes.
Apparently there are basically two types of rear axle.
The "thin" rear axle (200 mm drum brakes) and the "thick" rear axle (230 mm drum brakes). Most Haldane MK1's, including mine, were fitted with the "thin" axle.
So this is all about converting the Haldane Mk1 with "thin" rear axle to disc brakes.
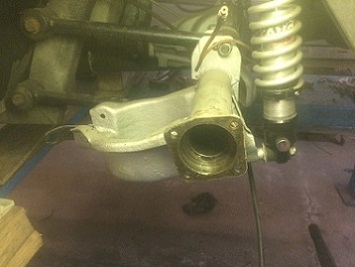
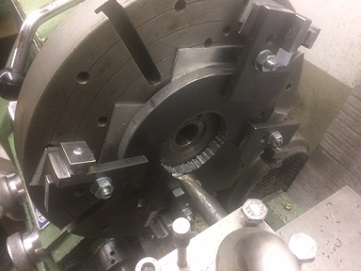
First I started to remove the rear wheels and dismantle the drum brakes.
To remove the half shafts a puller is needed which I made up from some scrap steel.
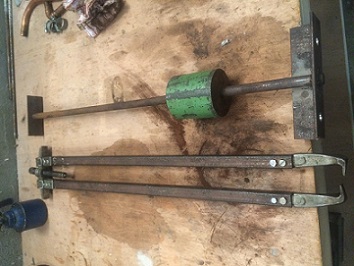
Puller (top) to dismantle half shafts. Result after dismantling.
First I searched for useable calipers. After some research I found out that the rear calipers from a Ford Focus (year 2012) are suitable.
Off course we will need a right hand rear caliper and a left hand rear caliper including brake pads, springs etc.

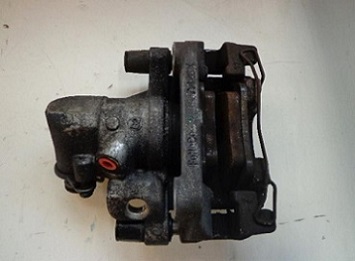
These calipers have a mechanical lever to be operated by the handbrake. Are quite substantial in braking force but are not too big.
There are so much variations on the market regarding discs. I thought I could find discs that would fit without modification. No chance!
The discs I found from a BMW were best I could find. They have a PCD of 4x100 mm and they fit onto the flange of the half shafts very good.
Half shaft flange diameter is 135 mm, disk has a recess of 137.5 mm.
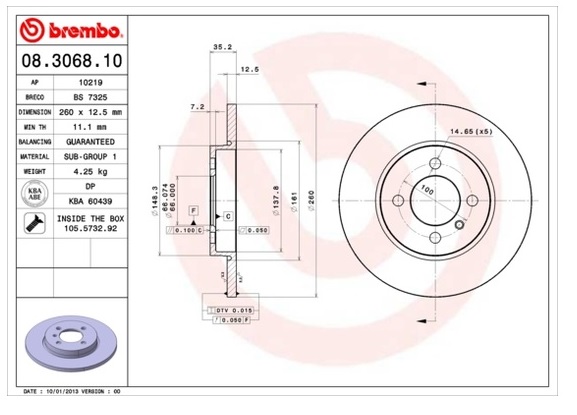
With a lathe I modified the discs to a thickness of 10 mm and outer diameter of 230 mm.
In order to correctly fit the disc onto the halfshaft you will need two centering rings to go from 57 mm on the half shaft flange to the disc inner diameter of 66mm.
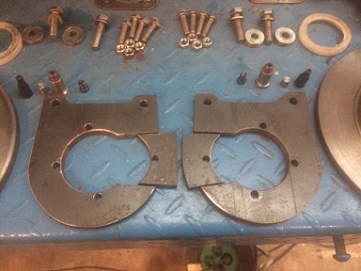
Main issue is the bracket to hold the caliper. First I made up a wooden template (several attempts) and after double checking I copied them to steel, they need to be really strong so thickness should be 10mm (not less!).
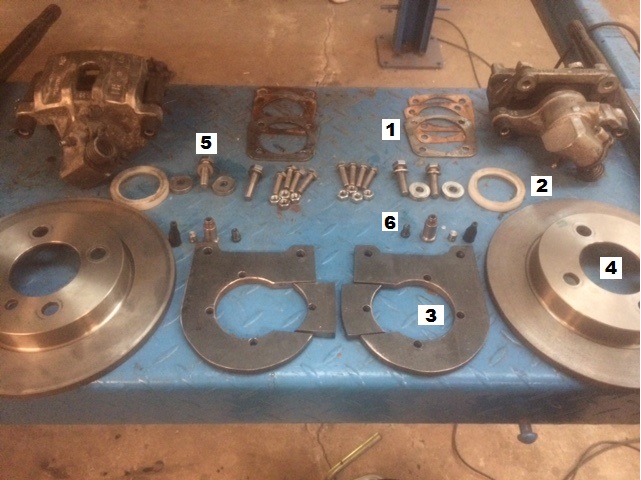
1 = Plate, 2 or 3 mm thick, this plate replaces the thickness of the drum brake backplate, use gaskets on both sides. It is also possible to cut up the backplate itself for that purpose.
2 = Centering ring, 57mm to 66 mm.
3 = Bracket to hold the caliper. A modest weld between the seqment and bracket for safety after fitting. To mount the bracket: Use 10.9 quality bolts only!
4 = Discs after modification on a lathe.
5 = Bolts to mount the calipers and two 6 mm thick washers, between caliper and bracket. Use 10.9 quality bolts only!
6 = Bushing to mount the handbrake cable to the caliper and a nipple to be hard-soldered to the cable.
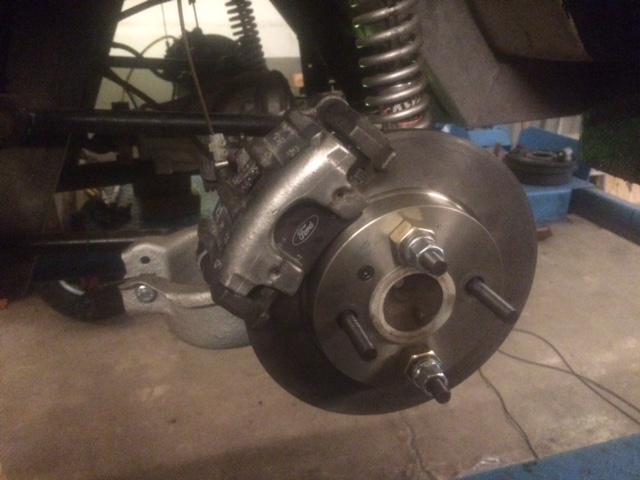
The disc has a provision for a retaining bolt. A hole has to be drilled in the half shaft flange and tapped to M8.
The bracket needs a hole of 70.4 mm. Caliper bolts are M10 and are 100 mm apart.
Other holes (three and one in the segment) to be marked up when the bracket is fitted flush to the flange and then drilled 8 mm.
Some proper engineering this is! The car brakes very well with them, no rattles, perfect!
Another thing to consider and very important:
With a 'front discs and rear drums' setup there is no need to use a brake bias proportioning valve.
With a 'front discs and rear discs' setup you do need one.
This valve is to regulate the front / rear brake pressure. The front brakes need more braking power, about 60% front and 40% rear.
It will prevent the rear wheels from locking up under (heavy) braking. I found out the hard way, it scared the hell out of me.
Don't forget, important!
Mount one in the engine bay on the brake line that goes to the rear of the car.
Example: Bias valve