
Hardtop.
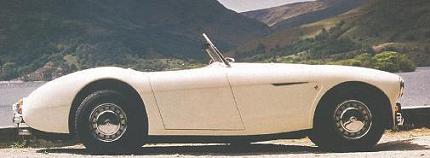
Years ago I found a hardtop for an Austin-Healey 100. There is very little information regarding these hardtops available on the internet.
I did however discover that it was a Universal Laminations hardtop with the wrap around windscreen. Two months later I found another
hardtop. This was also a Universal Laminations hardtop but with the smaller window. I prefer this one to the other.
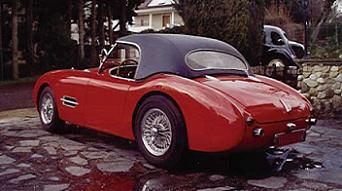
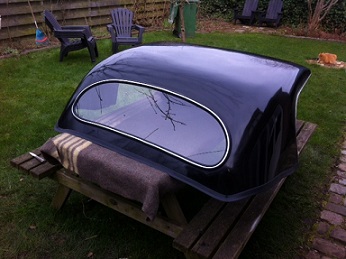
Universal Laminations hardtop version 1 "Small window".
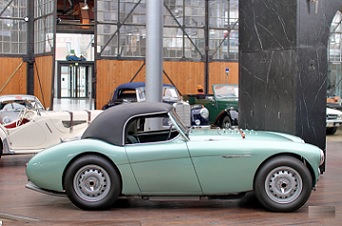
Universal Laminations hardtop version 1 "Small window".
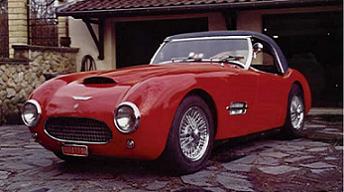
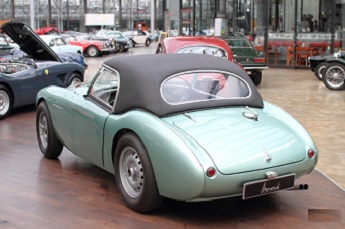
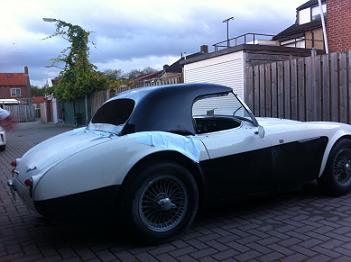
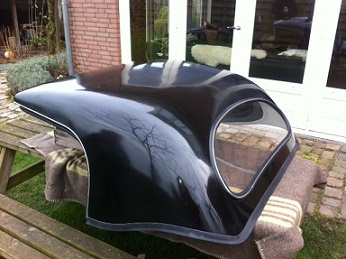
Universal Laminations hardtop version 2 "Wrap around window". It looks like the mask of a diver.
For more pictures click here.


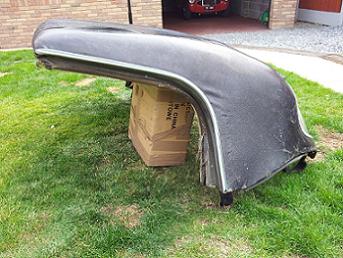
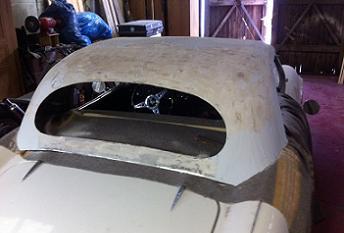
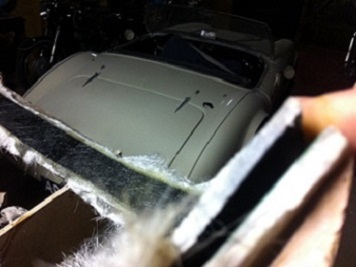
The hardtop that I bought is in a bad condition. 60 years old but still alive.
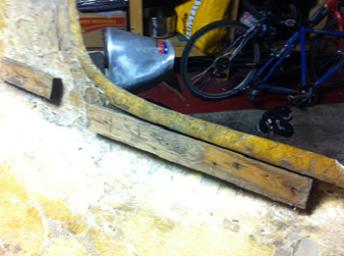
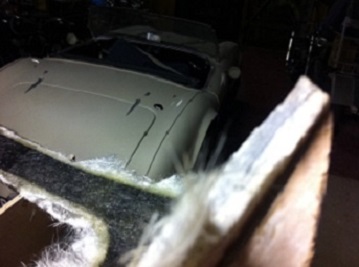
There was a lot of damage on the front of this hardtop. Almost all of the wood beam at the front was gone and large portions of the glassfibre
was simply missing. The outer and inner surface of this hardtop was not smooth, it looked like the landscape on the moon. This was some very crude
GRP craftsmanship. Because this hardtop is 60 years old I anticipated the GRP was rotten (and it was) but to see such bad lamination of the GRP
really struck me. The brackets that were bonded in were also very crude. What a mess!
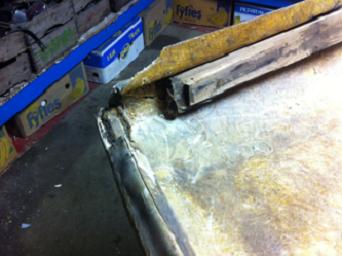
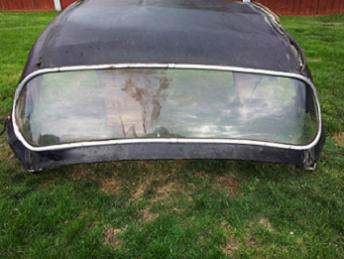
Front section where a wooden bow should be. Both corners gone.
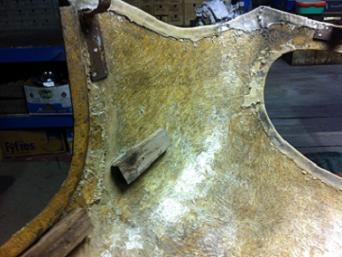
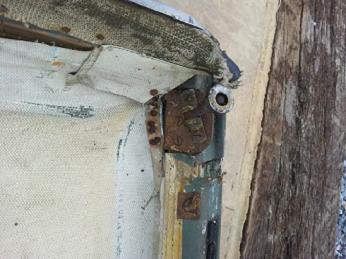
Right and left lower sections with brackets. Riveted with aluminium rivets.
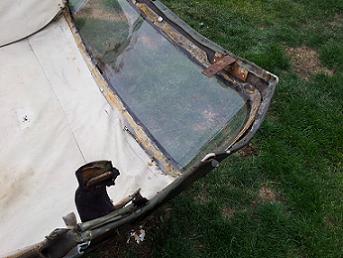
Overall inside view. Looks like a rather large section was replaced. This section is also quite old, if not, just as old as the rest.
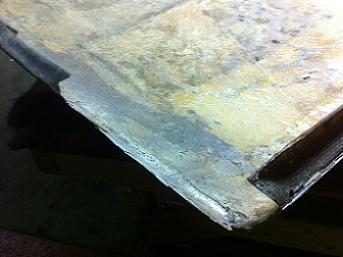
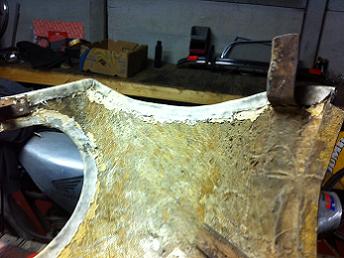
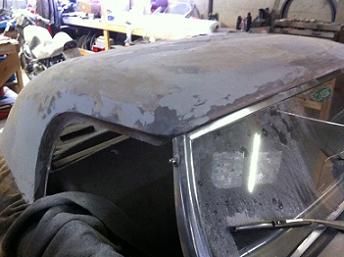
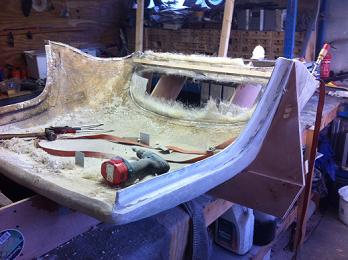
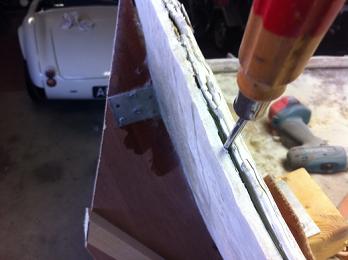
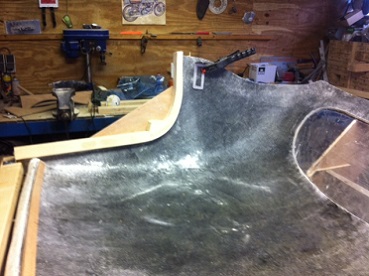
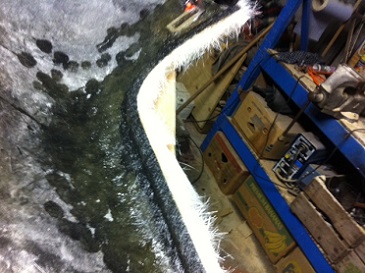
I started the restoration of the hardtop by making a new front bow out of wood. The bow is curved with the radius of the windscreen and lies flat on top of the windscreen. This bow is 25 mm thick and I laminated
that bow in the hardtop. I laminated an area of 20 cm before the bow on the inside to create some flesh on this front section to hold the wooden bow. I then grinded the front section away from the top, leaving the new lamination on the
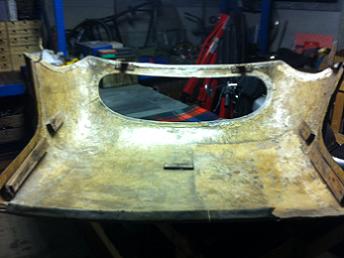
inside to fix the wooden bow. I then was able to laminate the top of the hood with fresh fibreglass and this recreated a complete new front section. Much better!
Next step was to remove all the old pieces of wood inside the hardtop and remove all the old brackets.
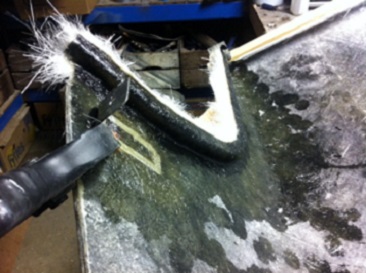
At the back there are two brackets that should slide inside the hood catches where the softtop bar normally resides.
On each lower corner, near the back of the doors, there is a bracket to fix the hardtop to the brackets inside the car where the
softtop frame is normally fitted. On the front bow there are two bolts with nuts to fix the front of the hardtop to the windscreen stanchions.
"Hood catch" for the front and brackets.
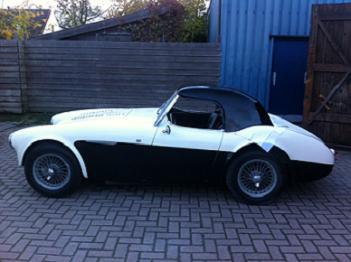
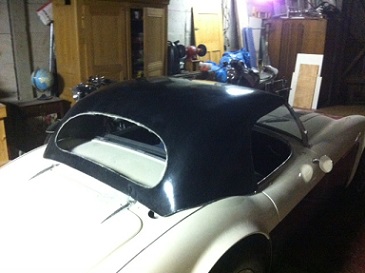
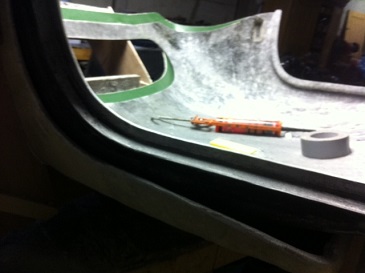
Unlike the Healey 100 the Haldane has a filler-cap for the petrol tank on the rear deck. The hardtop should be provided with a recess. An original Austin-Healey 100 has the petrol filler inside the boot.
To fit the hardtop I temporarily removed the filler cap from the rear deck. I tried the hardtop if it would fit the bodywork. Apart from some minor adjustments at both lower corners at the doors it fitted perfectly.
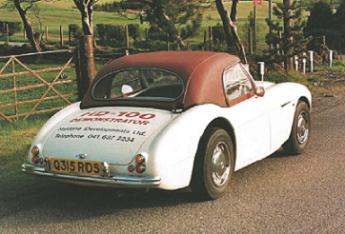
A Haldane HD100 fitted with this hardtop. Note the recess for the filler cap.
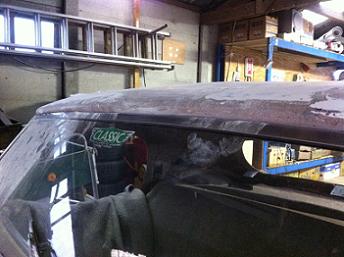
New front section created. Filling and sanding started. What a dust! It's like restoring my TVR Grantura....
Hardtop update.
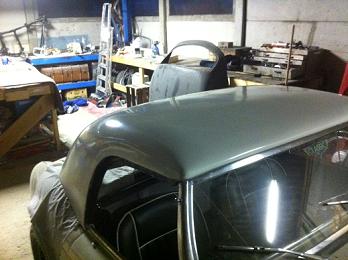
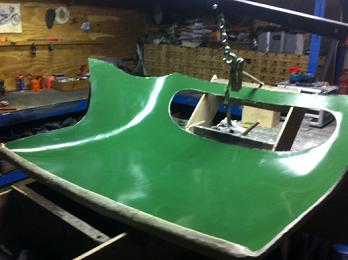
I started the process of grinding, sanding and painting in order to achieve a good finish. This is the first attempt using spray cans.
I wanted to see if the hardtop would have a good finish. It doesn't. I need to do some more work to get all the curves perfect. Especially the
roof of the hardtop is not correct. I find it very difficult the get a correct shape, with correct flowing "lines" in bright sunlight.
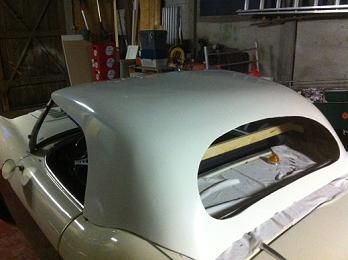
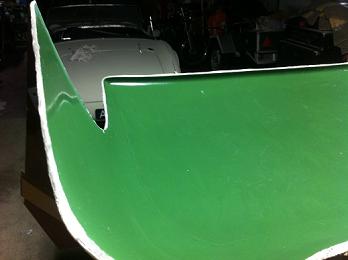
Simple spray to achieve a glossy finish. This allowed me to check if the surface and shape are correct.
I have gone through the process of filling, sanding, painting this *&#$$#!!## hardtop so much times I lost count.
At some point in time I decided the finish of the thing to be satisfactory.
The fact that this hardtop is so rare made me consider to make a good mould from it so I would be able to reproduce this hardtop. I have quite some experience with glassfibre reinforced plastic (GRP) from my TVR restorations so I gave it a go.
First the terminology: the old existing hardtop would now be called the "plug". From this plug I started to create a mould. From the mould one or more new hardtops (products) can be made.
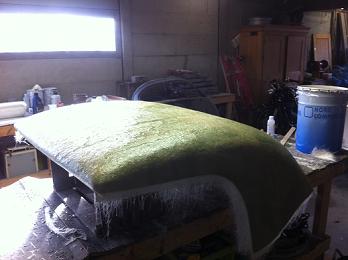
The plug was first polished to a high gloss finish and this was followed by coating it with polyvinlyalcohol (PVA) so it would come out of the mould.

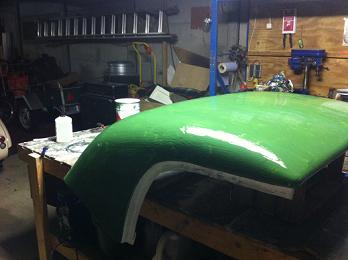
Then I covered the plug with two layers of gelcoat. Gelcoat is not to be confused with topcoat. Gelcoat hardens fully on the inside, whereas topcoat hardens fully on the outside.
A special gelcoat for moulds was used. This results in a very hard surface inside the mould so that several products can made from the mould.

After the gelcoat was dry enough I added two layers of 225 gr/m2 polyester, I used a special resin for moulds that will shrink less and that allows to lay-up more layers while they are wet.
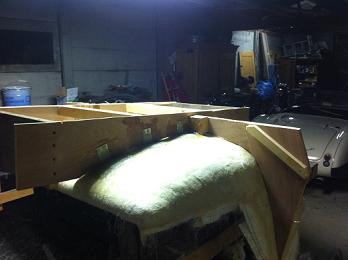
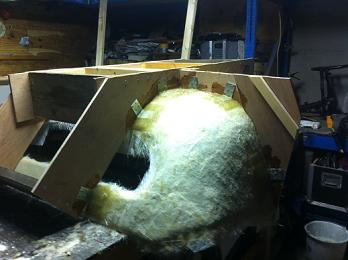
Followed by five layers of 450 gr/m2 polyester, again using the special resin. I also made a frame from wood around the mould and added iron brackets to that which were bonded to the mould with, again, locally added polyester layers.
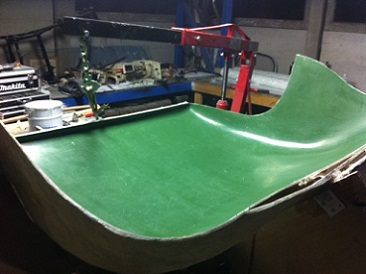
After the mould dried out for a few days I turned the mould upside down and removed the plug (the old hardtop) from the mould.
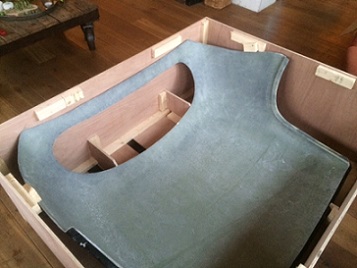
A good wash with water to remove the PVA and presto! A mould taken from the old hardtop.
One mould from which I can make a totally new hardtop. I tracked down all the necessary rubber profiles, the material for the rear window and started making all the necessary
brackets for this hardtop.
Hardtop update (March 2014)
It was time to make a new hardtop and I was quite nervous if the hardtop would release ok from the mould. This time I used release wax in the mould. I went to the process of waxing the mould eight times: rubbing the inner surface of the mould, letting the wax dry and polishing.
On the final coat I polished the mould even more and let it cure for a day. Then I coated the inside of the mould two times with black gelcoat. I let that dry out for about four hours and added two coats of
225 gr/m2 polyester with normal resin. The next morning I added three layers of 450 gr/m2 polyster with normal resin and after that had cured for almost two days I could no longer wait and tried to get it out of the mould.
That was encouraging. It released pretty easy.
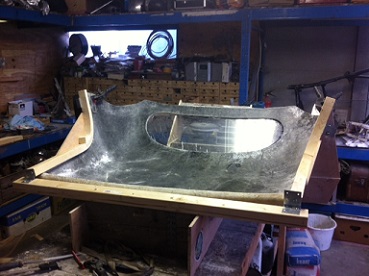
I trimmed all surplus polyester from the mould. After some use of wedges between mould and hardtop a totally new hardtop just popped out of the mould!
One new hardtop fresh from the mould. The mould itself very clean after hardtop was released!
Next task was to create the two edges, one for each door/sidescreen. I made them from wood and made sure they would fit exactly to the mould. These wooden profiles were trial mounted to the mould and then taken apart again and waxed eight times.
I placed the new hardtop back into the mould and mounted the two wooden door profiles. The area around it was lightly roughed up with coarse sandingpaper. I again added two layers of gelcoat and five polyester layers (2 * 225 gr/m2 and 3 * 450 gr/m2).
After that had cured I removed the wooden profiles and trimmed the dooredges on the hardtop.

New door edges for the hardtop.The next hardtop will be created with the door edges in one go. To be able to release the next hardtop the procedure is to trim the edges, remove the door profiles and extract the hardtop from its mould.
I also trimmed a perspex sheet to match the rear window aperture, glued the front wooden bow into the hardtop and the two brackets behind te doors were bonded in using polyester.
Next things on the todo list:
- polishing the hardtop
- headlining
- aluminium trim for the door apertures
- assembly of all rubber profiles
- two rear brackets
- two front brackets
Update June 2023 : In the past eight years I have built and sold close to 60 hardtops.
Orders can be placed, delivery will be between two or three months.
A complete hardtop costs 2.100 euro's, costs for shipping depends on destination.
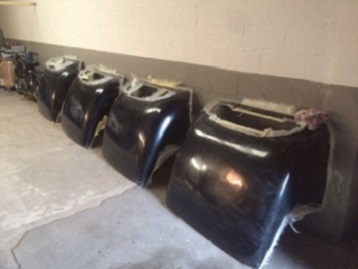
Hardtop shells are outsourced, ten shells at a time. Crated for shipment.
This is the final outcome of the hardtop from the mould.
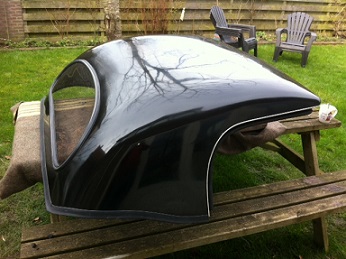
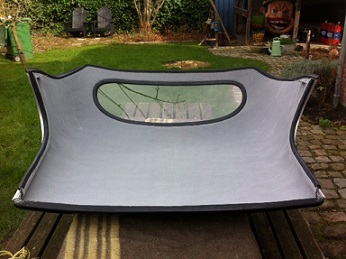
A rubber profile for the bottom edge, windscreen rubber and aluminium profile and rubbers for the door apertures. New headlining. Looks stunning on the car...